Description
The Node-red node includes documentation and usage guide for user to connect the device into the IoTConnect.
Features
- TPM based authentication support
- Need middleware node to parse data
- Multiple injector to support IoTConnect SDK
- Introduce Send Acknowledgement Method
- Symantec, X.509 Authentication Support
- Introduce Twin Property Methods
- Edge device support
- Offline data storage
- Device connection status
- Get Attributes Method
- Gateway device Support with non-edge device
This “IoTConnect” node supports device with following authentication type:
- Symmetric key (SaS token)
- Self-Signed certificate
- CA-Signed certificate
- TPM authorized device
How to build NodeJS sample code?
Prerequisite tools:
- Node.js 10.x and above (Download)
- NPM package manager compatible to Node.js version
Node-Red node Installation:
- Node-red App (Installation guide)
- Linux : sudo npm install -g --unsafe-perm node-red
- Windows: npm install -g --unsafe-perm node-red
- macOS: npm install -g --unsafe-perm node-red
-
Check the node-red application installed properly or not using the below command:
- node-red
Note : Note that it will show you the URL to open the app in the browser. Use that URL and open it in any web browser. The rest of the steps are same for Linux / Windows / macOS.
- Open browser and open URL: http://127.0.0.1:1880
- Stop Node-red Application from Terminal/Command prompt
- Go to to NODE-RED root directory to Install IoTConnect Node-red Node, Example Shown Below:
- Linux : cd /root/.node-red/

- Windows: cd C:\Users\<<system user>>\.node-red
OR
C:\Users\<<system user>>\AppData\Roaming\npm

- macOS :
MAC OS 10 : cd /var/root/.node-red/
MAC OS 12 : cd /Users/{login user}/.node-red/
- Linux : cd /root/.node-red/
- Add IoTConnect user to access NPM registry using the following command. It will ask for a username and password.
- npm adduser --registry https://repo.iotconnect.io/
- Username : iotconnect
- Password : @abcdefg8

- Email : You can use any email ID.
- Now users can access and install packages of the above registry.
- Use the following command to install “iotconnect-nodered-sdk” [you should be in node-red root directory].
- npm install iotconnect-nodered-sdk --registry https://repo.iotconnect.io/

- npm install iotconnect-nodered-sdk --registry https://repo.iotconnect.io/
- Use our IoTConnect node for Node-RED to communicate with the IoTConnect platform. Use the below command to start the node-red app.
- node-red

- node-red
- Verify the installed node into your node-red app.
- Select Menu(Top right corner) -> Manage Palette
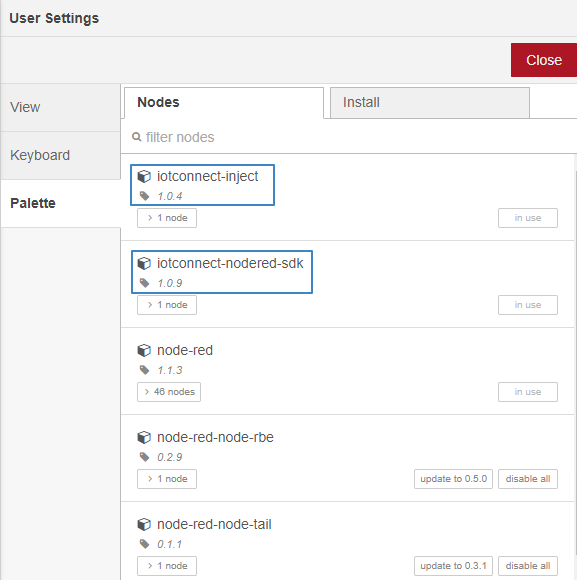
- There are two nodes installed in your node-red app
- iotconnect-nodered-sdk
- iotconnect-inject
- Search node from the left top corner to use it.
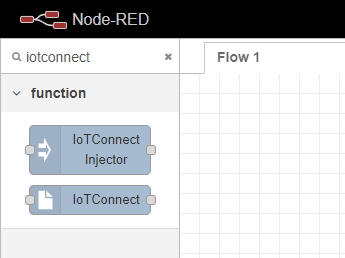
- Select Menu(Top right corner) -> Manage Palette
USAGE GUIDE ::
- There are two node installed in your node-red app
- IoTConnect
- IoTConnect Injector
1. IoTConnect
- Using this node, set the basic configuration to connect with the IoTConnect cloud. Drag and drop the node from the list to the blank screen.

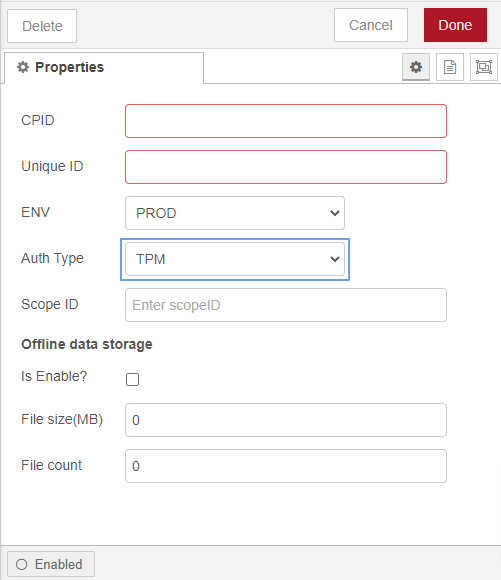
- Configure the required property of IoTConnect Node as shown below:
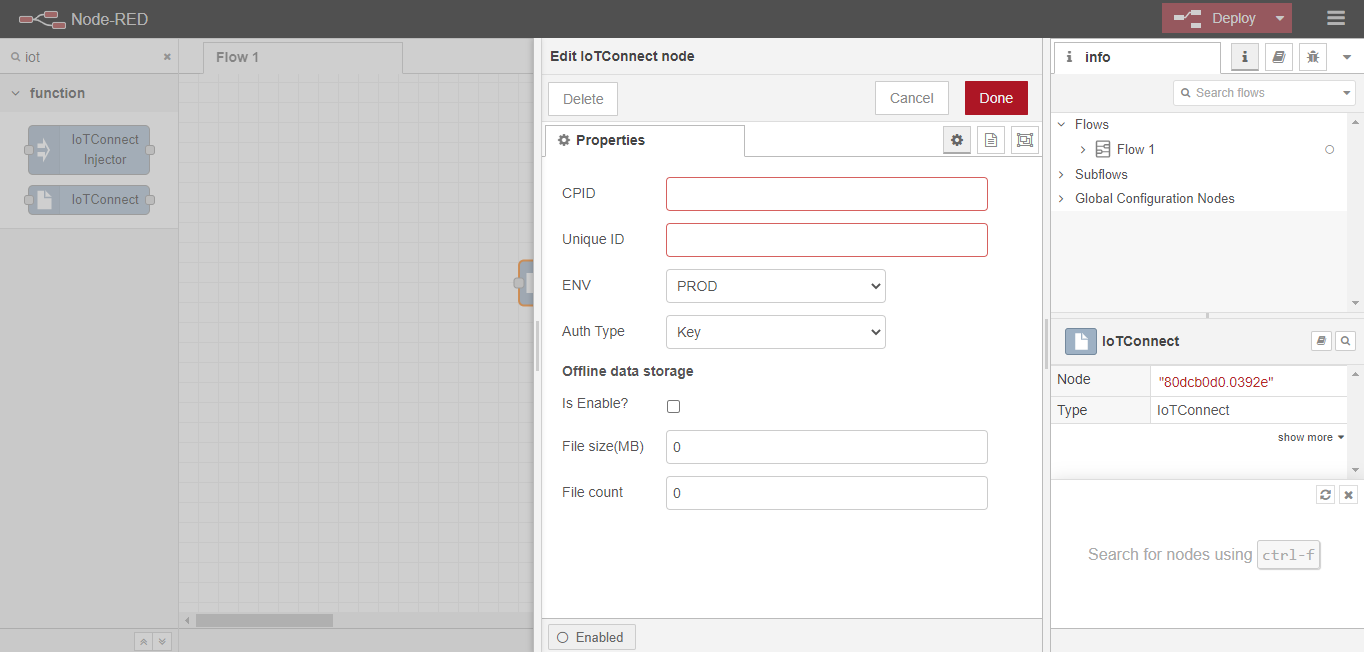
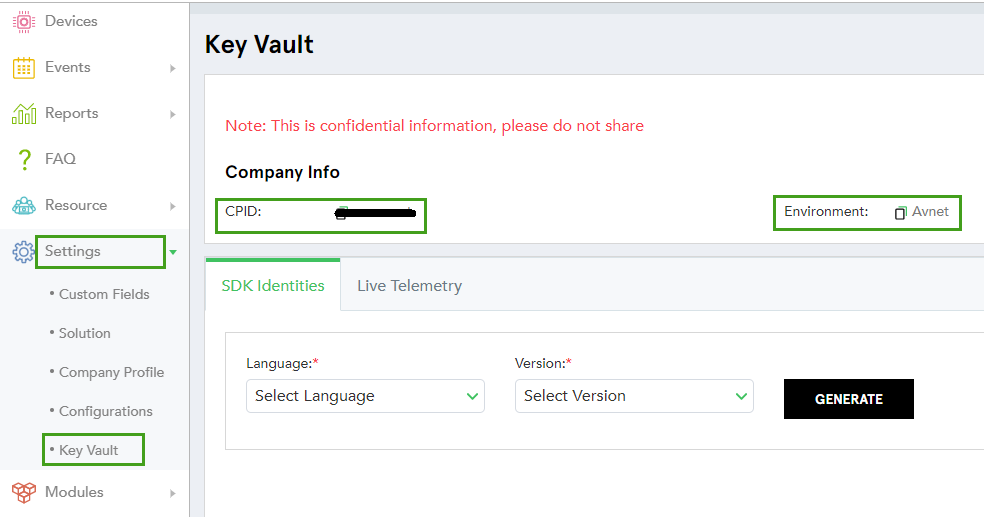
- CPID: Get it from the IoTConnect platform “Settings -> Key Vault”.
- Unique ID: Your device’s UniqueID.
- ENV: Get it from the IoTConnect platform “Settings -> Key Vault”.
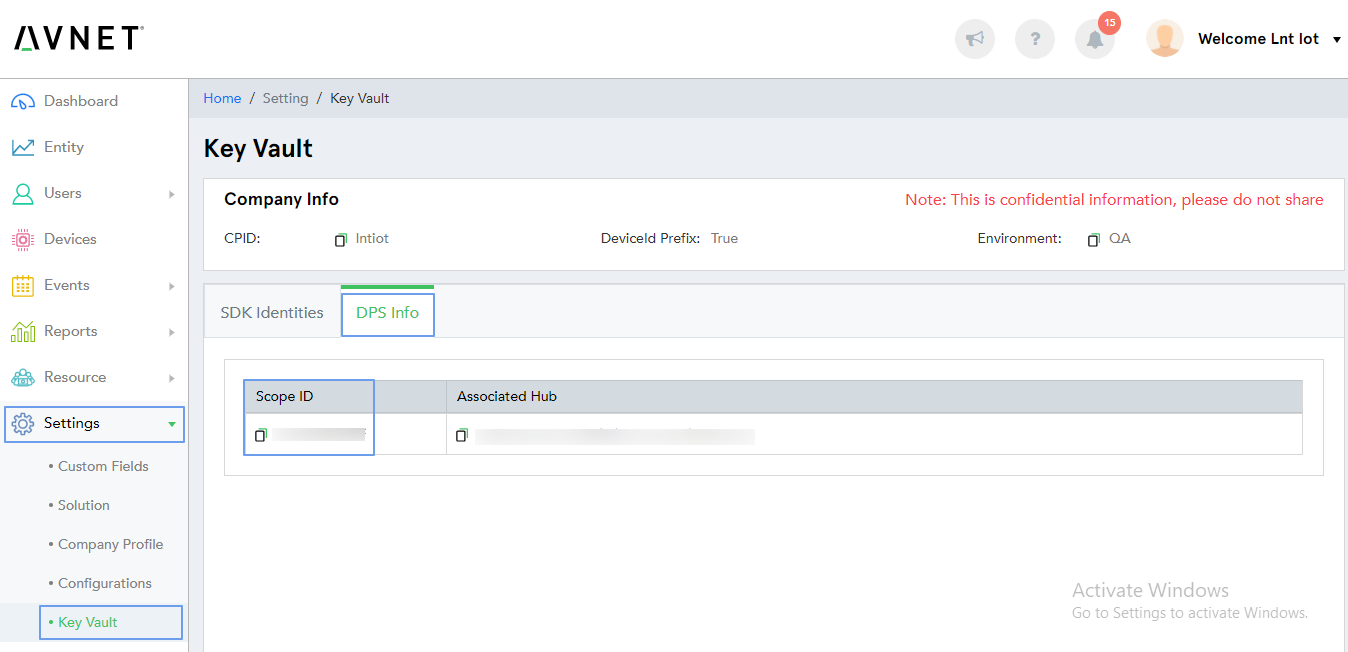
- See the below image to understand how to get the “CPID” and “ENV”.
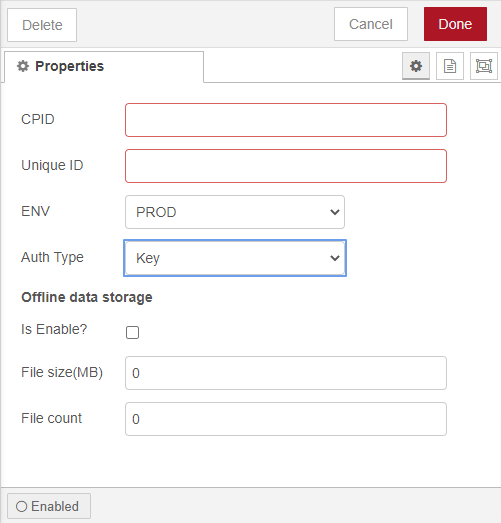
- Auth Type: This IoTConnect node supports four authentication type which is as below. You need to select the Authentication type as you have selected in our IoTConnect portal. It is the template that is associate with your device. You can refer to below snap for a better understanding.
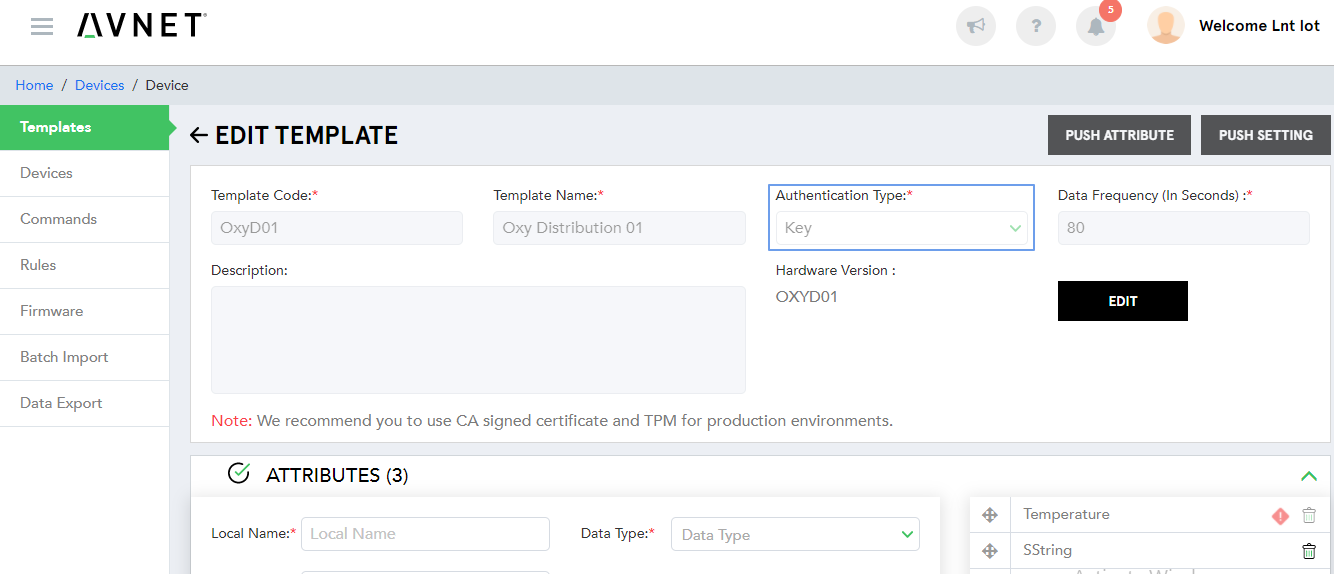
- Key: User need to use the Shared Access Signature (SAS) token to connect the device. For This type of authentication, It will manage the SaS token by it’s own.
- Self Signed Certificate: It helps device make secure by using the self-signed certificate. It needs the certificates to authorized the device connection. You need to provide the certificates as recommended in the snapshot.
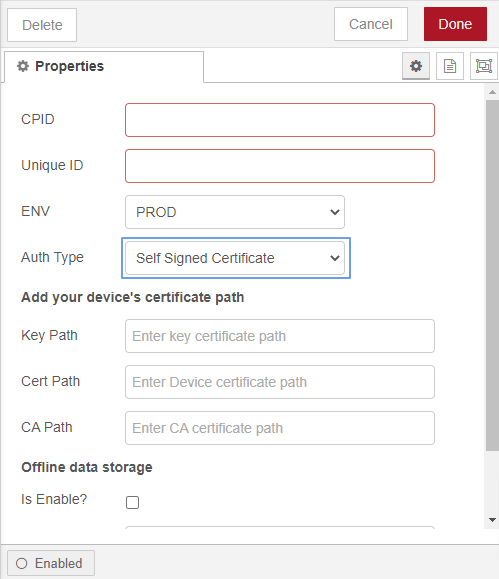
In case, if device authentication type is self-signed you need to select the “Self Signed Certification” option and provide the below certificates:- Key Path: Your device key.
- Cert Path: Your device certificate.
- Root CA Path: Root CA certificate.
- CA Signed Certificate: It helps device make more secure by using the CA-signed certificate. It needs the certificates to authorize the device connection.
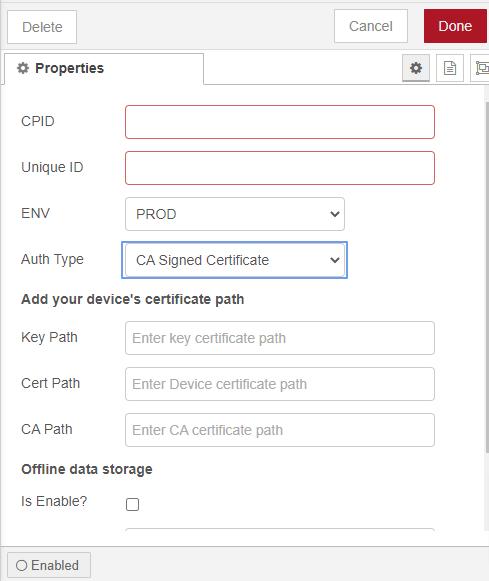
In case, If the device authentication type is CA-signed you need to select the “CA Signed Certification” option and provide the below certificates:- Key Path: Your device key.
- Cert Path: Your device certificate.
- Root CA Path: Root CA certificate.
- TPM: It is the most secure amongst the all device connectivity authentication type which provided by the Azure. For this you need a specific TPM supported device. Once you select the auth type “TPM”, Then it will be recommended to enter “Scope ID”.
You can get the “Scope ID” from the IoTConnect portal “Setting -> Key Vault -> DPS Info -> Scope ID”. You can refer to the below snapshot.
- Key: User need to use the Shared Access Signature (SAS) token to connect the device. For This type of authentication, It will manage the SaS token by it’s own.
- Offline data storage: It helps in storing the data in the log file, which will be created beside the firmware sample file. So, make sure your root directory has proper permission to create the log files and folder. It will store offline data once the device lost the network connection
- Enable?: true = offline data storing, false = not storing offline data (Default = false).
- File size (MB): Define the file size of offline data which should be in (MB) (Default = “”).
- File count: Number of files need to create for offline data (Default = 1).
- Now you can connect this node with the debug message to see the output in the debug log.
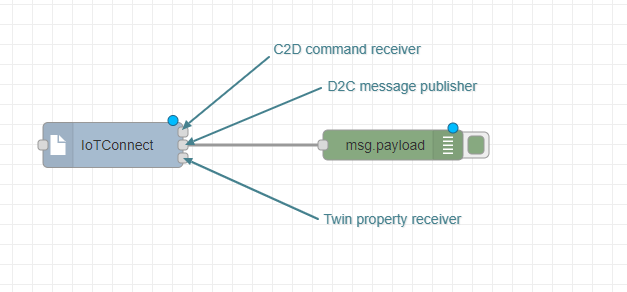
- Here, you can see the three output node.
- command receiver: User can receive the Device and OTA command using this output node.
- D2C message publisher: User can see the output log and other messages in log view using “msg.payload” node.
- Twin message receiver: User can receive the Desired and Reported twin properties from cloud which has associated with the template.
2. IoTConnect Injector
- It is the helper node created for the “iotconnect-nodered-sdk” node.
- It can allow the following operations with the connected device.
- Send data
- Device command acknowledgment
- OTA command acknowledgment
- Get all twin messages
- Update twin messages
- Get attributes list
- Connect device
- Disconnect device
2.1 Send data
- Drag and drop the new injector and select “SendData”.
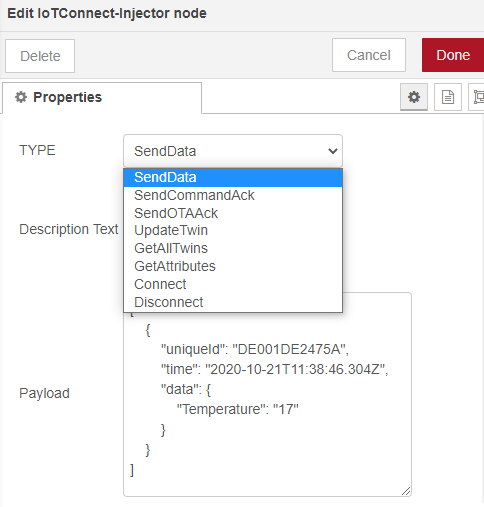
- You can send the data using this injector.
- Make sure Payload must match your template’s attributes.
- Input data payload example:
- For Standard Device
[{ "uniqueId": "< Device UniqueId >", "time" : "< Date time >", // "2019-12-24T10:06:17.857Z" Date format should be as defined "data": {} // example : {"temperature": 15.55, "gyroscope" : { 'x' : -1.2 }} }]; - For Gateway Device
[{
    "uniqueId": "< Gateway Device UniqueId >", // Gateway device ID should be first in JSON
    "time": "< Date time >", // "2019-12-24T10:06:17.857Z" Date format should be as defined
    "data": {} // example : {"temperature": 15.55, "gyroscope" : { 'x' : -1.2 }}
},
{
    "uniqueId":"< Child DeviceId >", //Child device
    "time": "< Date time >", // "2019-12-24T10:06:17.857Z" Date format should be as defined
    "data": {} // example : {"temperature": 15.55, "gyroscope" : { 'x' : -1.2 }}
}]
uniqueId: Your device Unique ID
time: Date time with the predefined format “2019-12-24T10:06:17.857Z”
data: It is the object type data with all required attributes which has associated with the device and template
- For Standard Device
- Note : Device attributes are associated with the device template. Else, they cannot send data to the cloud.
- After saving the injector type and payload, click the ‘inject button’ as shown below:

- Make sure that your device is connected when you click the inject button.
- After making changes in the node, you need to deploy those changes by clicking ‘Deploy’ from the top right corner.
- You can now see the send data payload in debug mode.

2.2 Device command acknowledgment
- Drag and drop the new injector and select “SendCommandAck”.
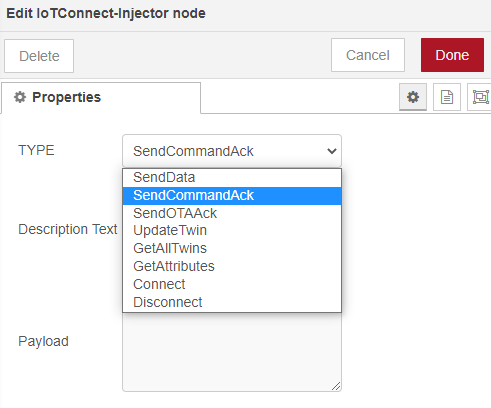
- It receives a command from the cloud (C2D) and stores it in the payload.
- You can see the command payload in the debug log too.

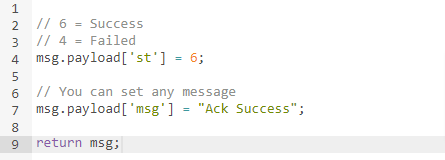
- You need to use custom middleware node to parse the status of the device command Acknowledgement. We have used Node-red “Function” node to parse the data to the IoTConnect injector node.
- Drag and drop the “Function” node from the left panel of the Node-red UI
- You can set the status “st” and message “msg” properties as defined below example.
- Device command acknowledgment publish data format reference URL Click here
2.3 OTA Command Acknowledgment
- Drag and drop the new injector and select “SendOTAAck”.
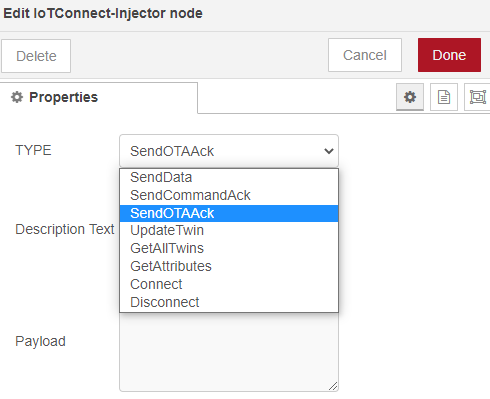
- It receives the OTA command from the cloud (C2D) and stores it in the payload.
- You can see the command payload in the debug log too.

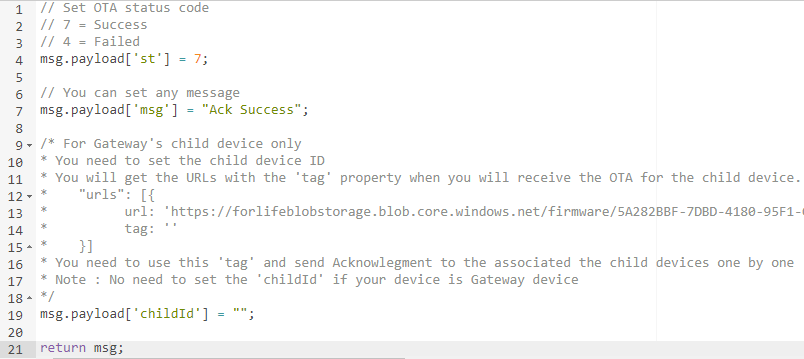
- You need to use custom middleware node to parse the status of the device command Acknowledgement. We have used Node-red “Function” node to parse the data to the IoTConnect injector node.
- Drag and drop the “Function” node from the left panel of the Node-red UI
- You can set the status “st”, message “msg” and child UniqueId “childId” properties as defined below example.
- OTA command acknowledgment publish data format reference URL Click here
2.4 Get All Twin Messages
- Drag and drop the new injector and select “GetAllTwins”.
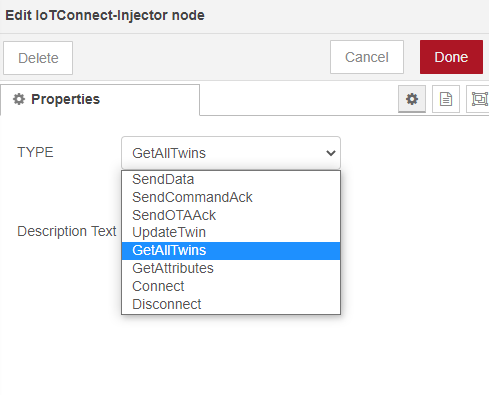
- Get all the desired and reported properties of the device’s twin using this injector.

- It allows a user to send the request for all the twin properties added in the IoTConnect portal.
- A receiver will receive all the twin properties.
- We can also send specific desired twin properties from the IoTConnect portal to update their reported property.
2.5 Update Twin Messages
- Drag and drop the new injector and select “UpdateTwin”.
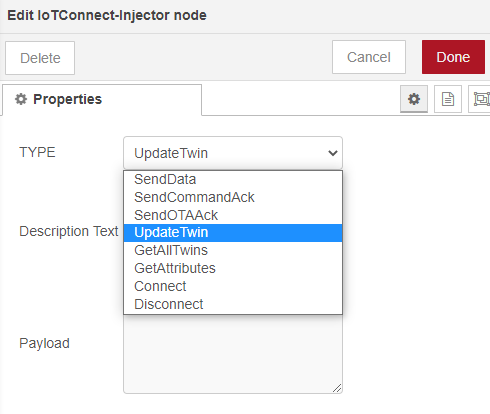
- It allows updating the Twin Reported Property using this injector.
- It receives twin messages from the twin property receiver as defined below.
- We have set the receiver and update the injector to update the auto twin property for this application.

- You need to use custom middleware node to parse the status of the device command Acknowledgement. We have used Node-red “Function” node to parse the data to the IoTConnect injector node.
- Drag and drop the “Function” node from the left panel of the Node-red UI
- You can set the “key” and “value” properties as defined below example.
- Twin reported property update data format reference URL Click here

2.6 Get All Attributes
- Drag and drop the new injector and select “GetAttributes”.
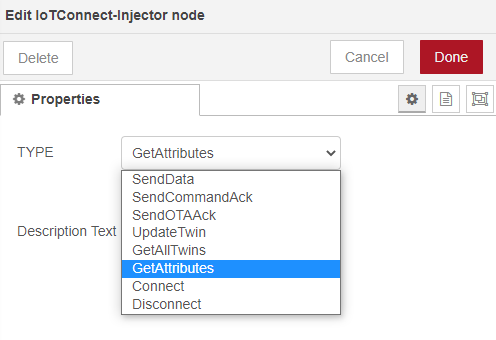
- A user can see the list of attributes with the required properties with respect to the device.

2.7 Connect Device
- Drag and drop the new injector and select “Connect”.
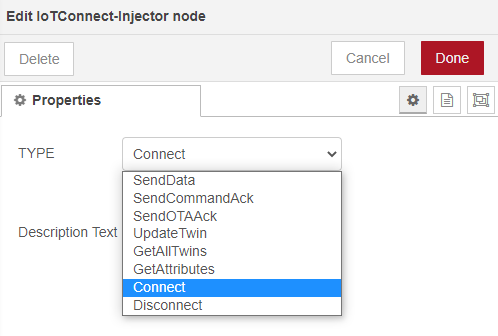
- Once the device is disconnected through a disconnect node or any other reason, a user can ‘Connect’ the device.

2.8 Disconnect Device
- Drag and drop the new injector and select “Disconnect”.
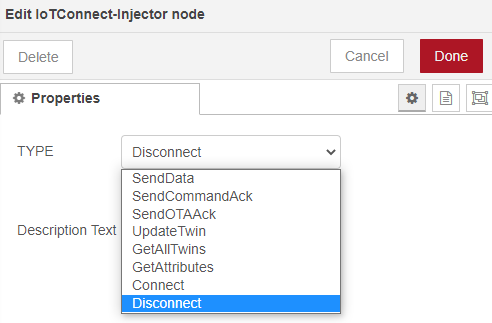
- • A user can disconnect the device.

