Using SDK integration, you connect your device to IoTConnect and send data to the cloud. Now, to take the data back from the cloud into your storage, this section of configurations offers various ways of extracting the data.
You can retrieve data up to 30 days old from IoTConnect. We understand that you need to import, transfer, load and process data from various sources. You may also require data in continuous, real-time, or batched format. IoTConnect allows you to extract data through a variety of means. This section describes those means through which you can extract
the telemetry data.
Configurations list
It lists all the ways through which you can extract the data. The list is as per the following:

(Screen: Configurations list)
To access any of the means shown above, click the radio button. By clicking on it, another screen will appear with the required fields. Choose or enter those fields. You are good to go. Some examples are shown below.
Data Ingestion API
This API helps you to ingest data in single or bulk volumes. Whether you have an SSL or non-SSL environment, you need to select the authentication type as shown in the following screen:
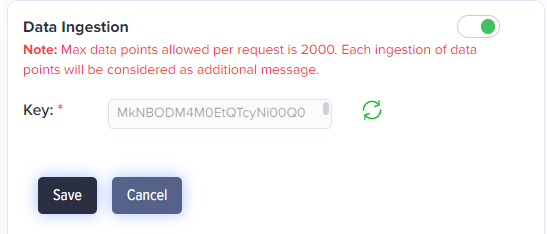
(Screen: Data Ingestion API)
The key will be generated, when you select the Key. If you have self-signed or CA-signed SSL certificate, you can choose either. You will get data ingestion API URL to import the data.
Telemetry in Reporting Database
To export data from the IoTConnect to the MS SQL server, you can insert the connection string of your server (see the below image). The system will start to export data.
- Data Source – Enter your server IP or domain
- Port – SQL access port
- Initial Catalog – Database name
- UserID and Password – SQL server user and password
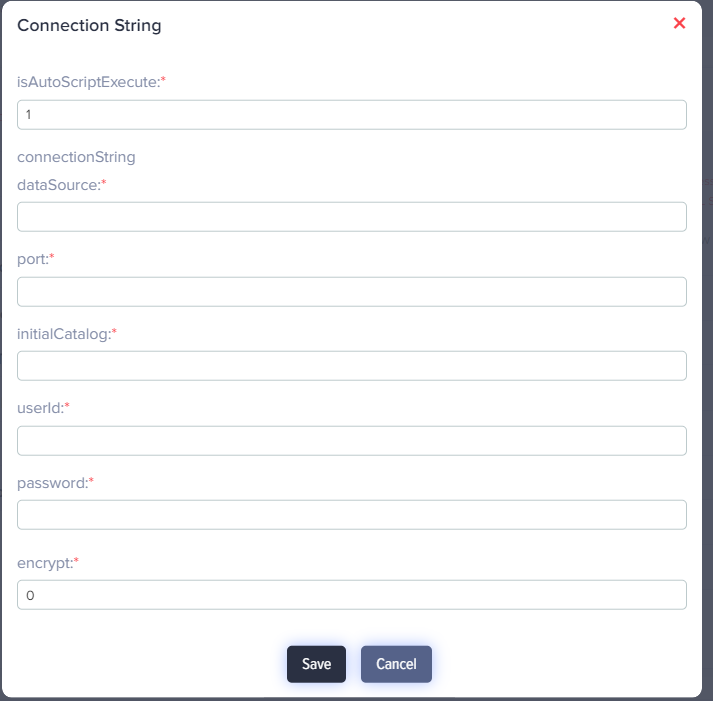
(Screen: Telemetry in reporting database)
Power BI Connector
To export data to Power BI directly from IoTConnect, follow the steps defined by clicking on the info icon.
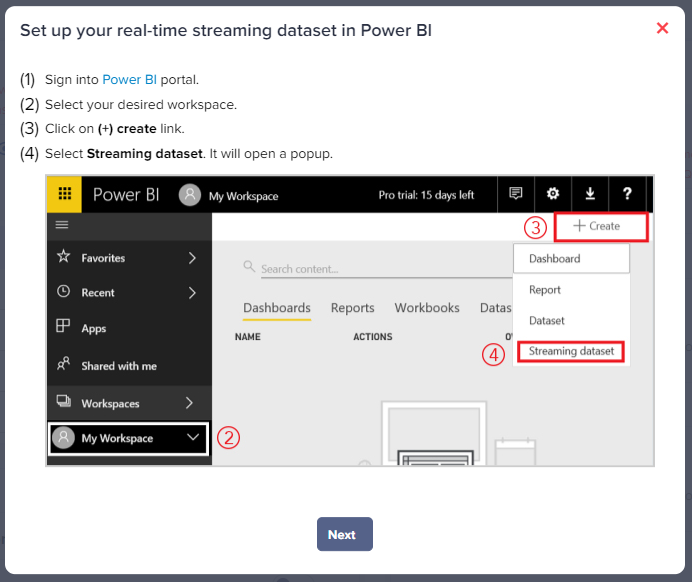
(Screen: Power BI Connector)
Custom File Storage
Extract the telemetry data you are capturing via sensors through REST API. To extract the data, enter your storage name in the field of custom file storage.
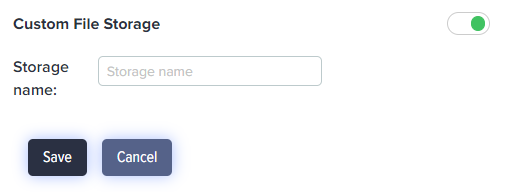
(Screen: Custom File Storage)
Blob Storage
- Storage Account – Name of your storage account
- Storage Account Primary Key – You can find the key from your Azure storage account
- Container Name – Name of your blob container
- Path Patterns – You can define folder structure like {deviceId}/{date}
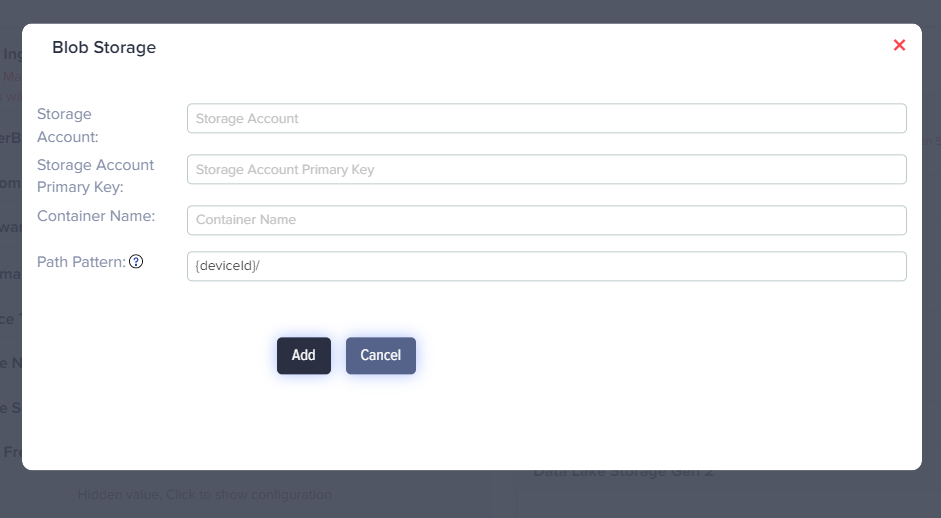
(Screen: Blob Storage)
Cosmos DB
- URL – Find your URL from Azure Cosmos DB Account -> Keys -> Read-write Keys and enter here
- Account Key – Azure Cosmos key
- Database Name – Name of your database
- Collection Name Pattern – Container name
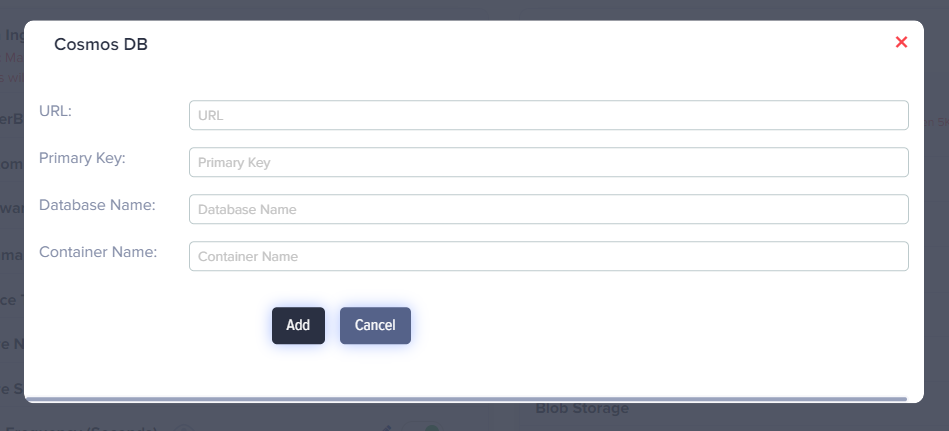
(Screen: CosmosDB)
Service Bus
- Service Bus Namespace – Name of your Service Bus namespace
- Policy Name – Name of your policy
- Policy Key – Azure key of policy
- Service Bus Type – Topic or Queue
- Topic Name – Name of your topic or queue
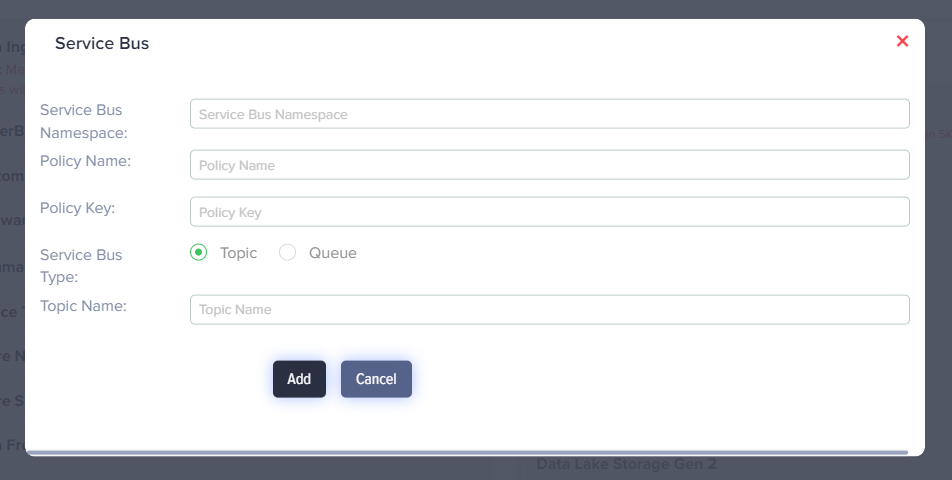
(Screen: Service Bus)
Event Hub
- Event Hub Namespace – Name of your Event Hub namespace
- Event Hub Name – Name of your Event Hub name
- Policy Name – Name of your policy
- Policy Key – Primary key of policy
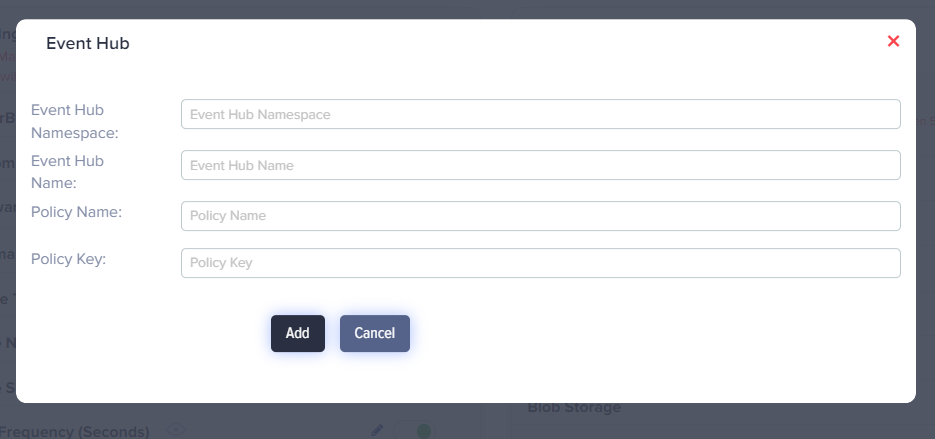
(Screen: Event Hub)
In any of the configurations,
- Click Save or Add to save or add the information you entered.
- Click Cancel to go back without saving the information.